Python
Data Analytics
Introduction to Tkinter Widgets and Layouts


Tkinter is a powerful and user-friendly library in Python that is widely used for building graphical user interface (GUI) applications. It comes bundled with Python, making it a convenient choice for both beginners and experienced developers who want to create desktop applications. Tkinter provides a rich collection of widgets—predefined GUI elements—that you can use to design and build interactive and visually engaging applications.
In this comprehensive guide, we will delve into some of the most commonly used Tkinter widgets: Buttons, Labels, and Entry Fields. These widgets are the building blocks of almost every GUI application. We will explain their core functionality, discuss the customization options available, and demonstrate their usage through practical examples. Whether you're designing a simple form or a full-featured application, understanding these widgets is essential for effective GUI development in Python.
Understanding Tkinter Layout Management
Creating a visually appealing and user-friendly GUI involves more than just placing widgets on the screen. Proper layout management ensures that widgets are arranged in a way that is logical, responsive, and easy to interact with. Tkinter provides three primary layout management techniques: Pack, Grid, and Place. Each of these layout managers offers unique capabilities and is suited for different types of layouts and design requirements.
- Pack is simple and ideal for basic layouts where widgets are stacked vertically or horizontally.
- Grid offers more control, allowing you to place widgets in a tabular format defined by rows and columns.
- Place provides absolute positioning, giving you complete control over where each widget appears on the screen.
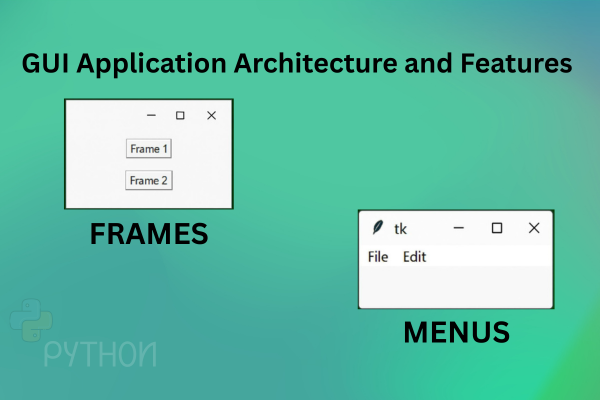
Enhancing GUI Structure with Frames and Menus
When building complex GUI applications, it's important to maintain a clear structure and intuitive navigation. Two essential tools in Tkinter for achieving this are Frames and Menus.
- Frames act as containers that group related widgets together. This not only helps in organizing the layout but also makes your code more modular and easier to maintain. You can use frames to separate different sections of your application, such as headers, sidebars, or content areas.
- Menus, on the other hand, enable you to incorporate dropdown menus, toolbars, and other navigational elements into your application. With menus, you can provide users with access to features like file operations, settings, help sections, and more. Menus can be nested and customized to suit the specific needs of your application.
Labels:
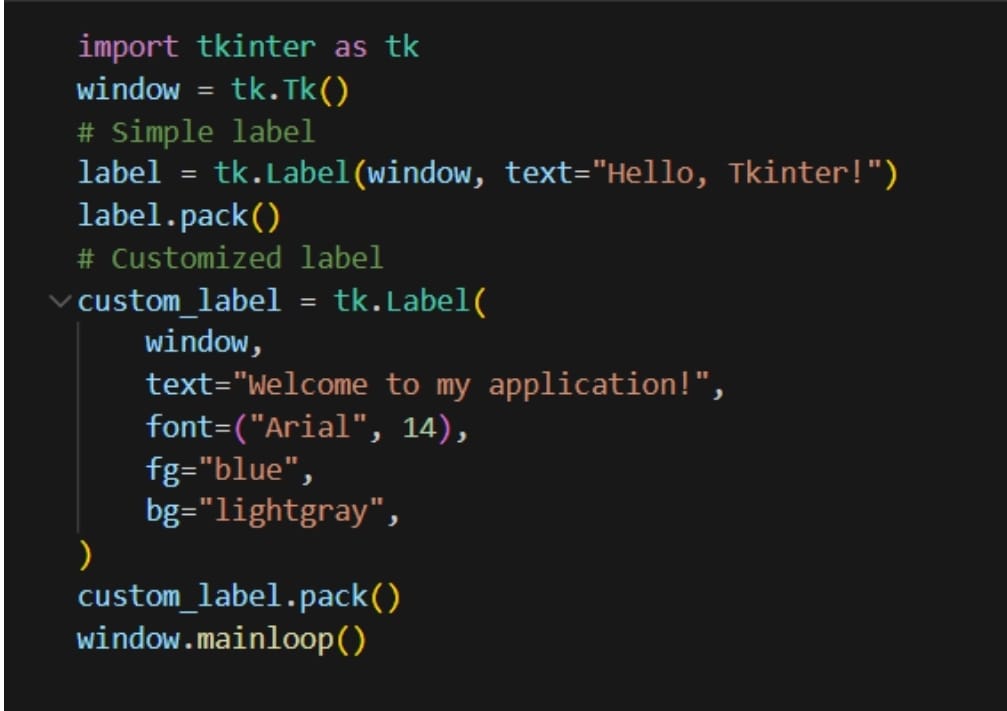
Labels are simple yet essential GUI components used to display static text, images, or both. In Tkinter, labels are commonly used for headings, captions, instructions, or to provide visual context in the user interface. Although labels are non-interactive (i.e., they don’t accept user input or trigger actions directly), they play a crucial role in guiding users through the application.
Basic Syntax for Creating a Label
Buttons:
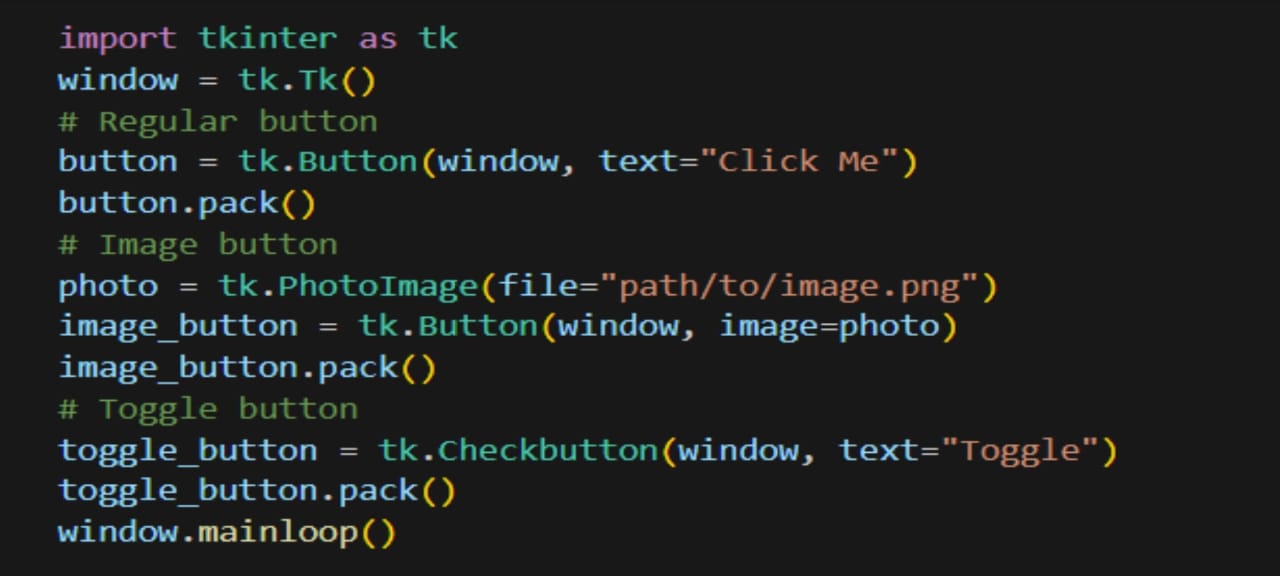
Buttons are one of the most fundamental and widely used widgets in any graphical user interface. They allow users to perform specific actions or commands—such as submitting a form, opening a file, or quitting the application—by simply clicking on them. In Tkinter, the Button widget is highly customizable and can be configured with different styles, colors, text, images, and command functions.
Basic Syntax for Creating a Button
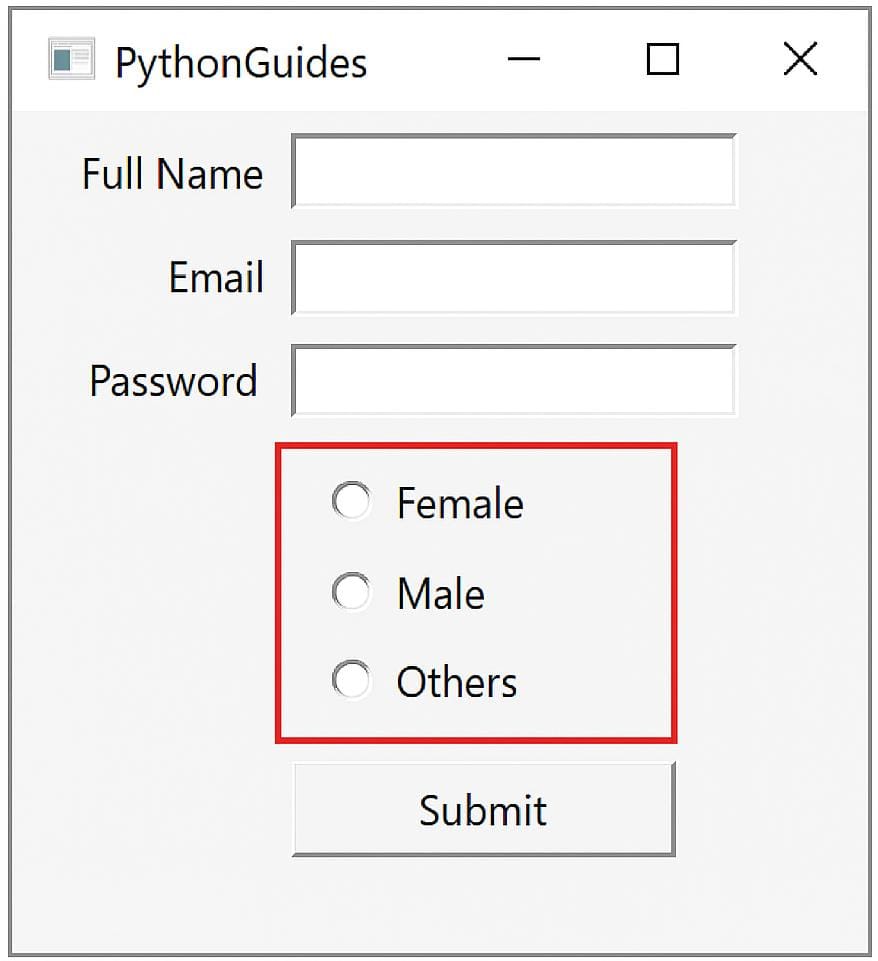
Entry Fields:
Entry fields, also known as text input fields, are used to capture input from users in a Tkinter application. Tkinter provides the Entry widget to facilitate single-line text entry, making it ideal for forms, login screens, search boxes, and other interactive components that require user input.
Basic Syntax for Creating a Entry Fields
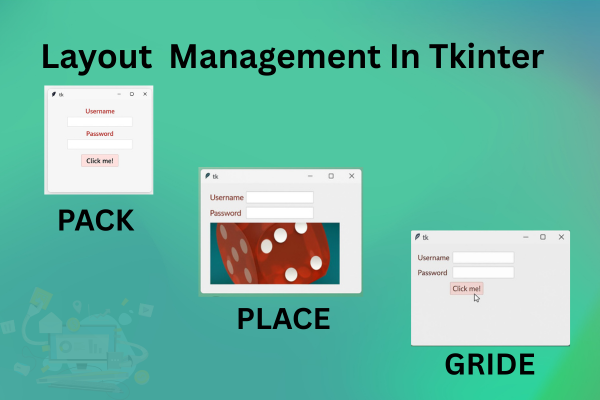
Layout Management in Tkinter: Pack, Grid, and Place
In Tkinter, once you've created widgets like buttons, labels, or entry fields, you need to position them within your application window. This is where layout management comes into play. Tkinter provides three geometry managers to control the layout and arrangement of widgets:
- pack()– Simplest layout method; stacks widgets vertically or horizontally.
- grid() – Aligns widgets in a grid of rows and columns, great for forms and tables.
- place() – Allows absolute positioning using x and y coordinates
1. Pack Layout Manager:
The Pack layout manager is one of the simplest and most widely used layout systems in Tkinter. It arranges widgets by stacking them either vertically (top to bottom) or horizontally (left to right) within their parent container. This manager is ideal for basic layouts where widgets are placed in a linear, flowing manner without the need for complex alignment or grid-based positioning.
Example: Using pack() Layout Manager in Tkinter
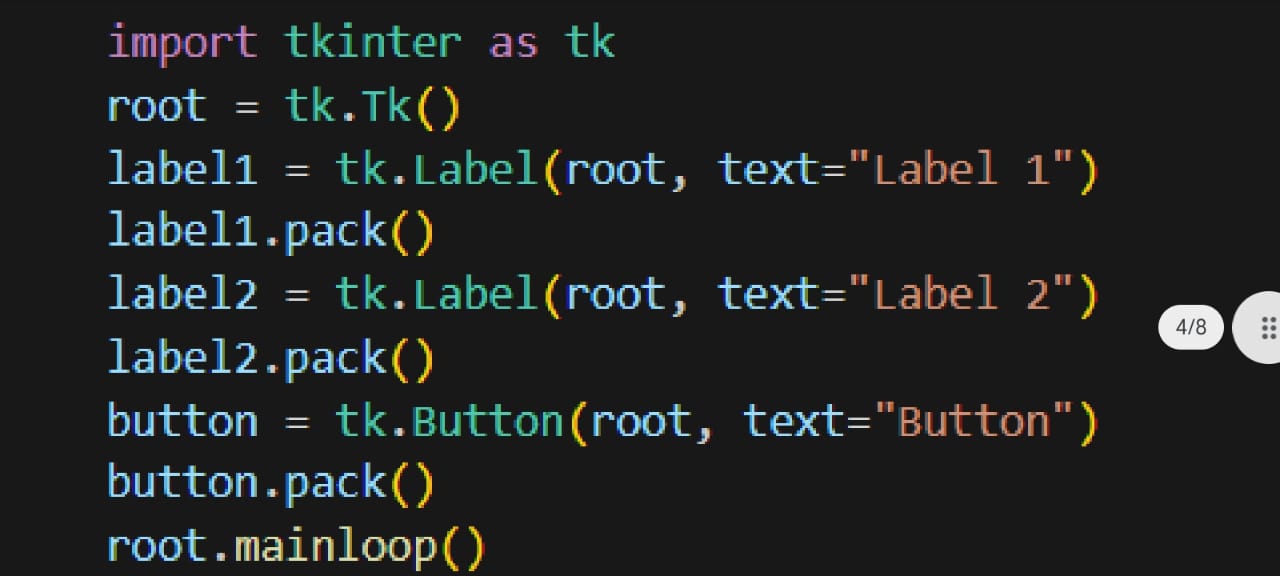
In this example, the pack() method is called on each widget to pack them vertically one after another. The Pack layout manager adjusts the size of each widget based on its content and the available space.
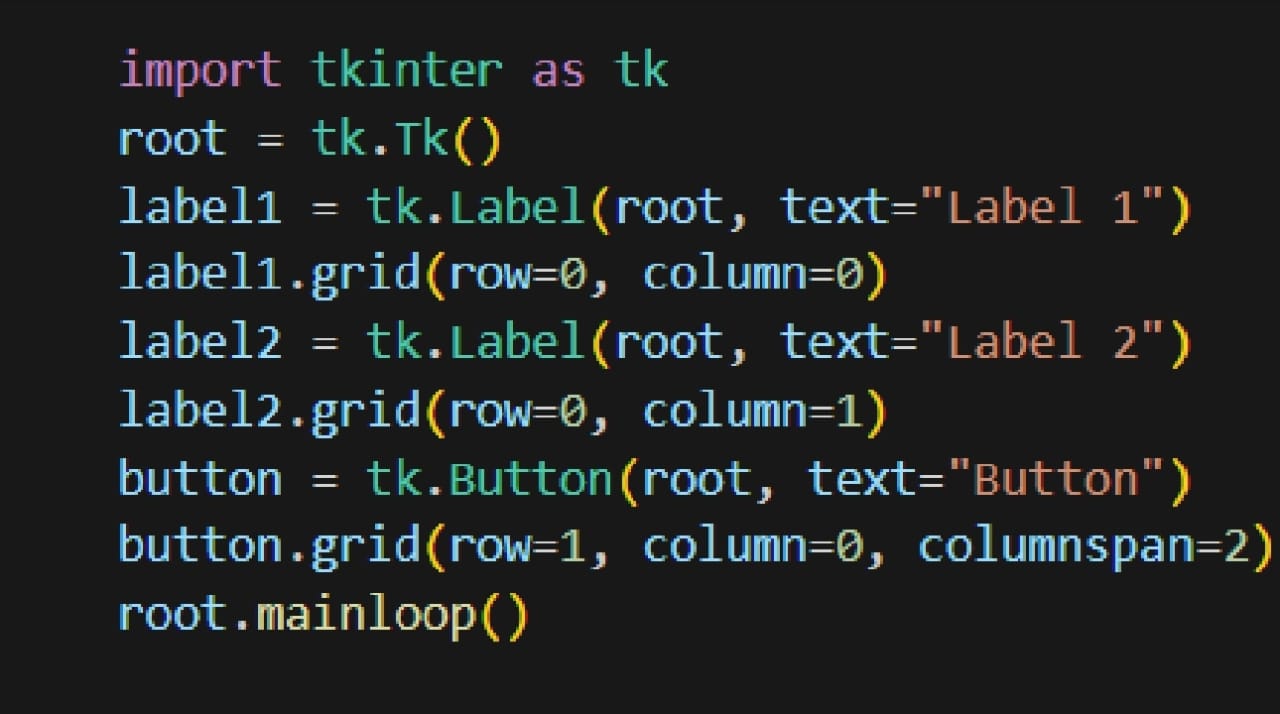
2. Grid Layout Manager:
The Grid layout manager offers a table-like (row-column) structure for organizing widgets. It allows you to place widgets precisely in a specific cell of an invisible grid, providing much greater control over layout and alignment than the Pack manager. Each widget is assigned a row and column, and you can control spacing, alignment, and spanning across multiple rows or columns.
Example: Using grid() Layout Manager in Tkinter
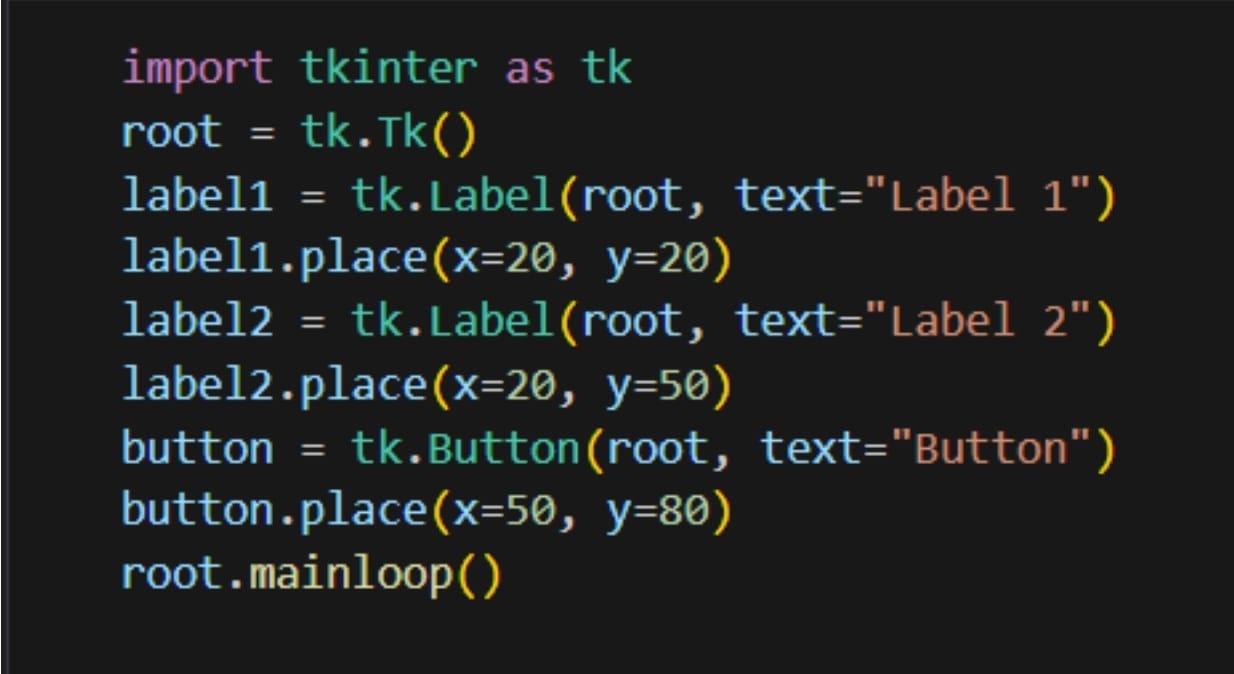
3. Place Layout Manager:
The Place layout manager in Tkinter allows you to position widgets explicitly by specifying their exact coordinates (x and y) or relative positioning within their parent widget. Unlike Pack and Grid, which handle layout automatically, Place gives you absolute control over where each widget appears, including its size and anchor point.
Example: Using place() Layout Manager in Tkinter
Working with Frames and Menus in Tkinter
In Tkinter, Frames and Menus play crucial roles in building structured, organized, and interactive GUI applications.
- Frames act like containers to group and organize widgets logically and visually.
- Menus provide a way to integrate dropdown navigation and commands, enhancing the usability of your application.
Working with Frames:
Frames in Tkinter serve as container widgets that are used to group and organize other widgets within an application. Think of a frame as a subsection or a mini-window inside your main window. Frames make it easier to build modular, structured, and manageable GUIs, especially as your application becomes more complex.
Example: Using Frames in Tkinter
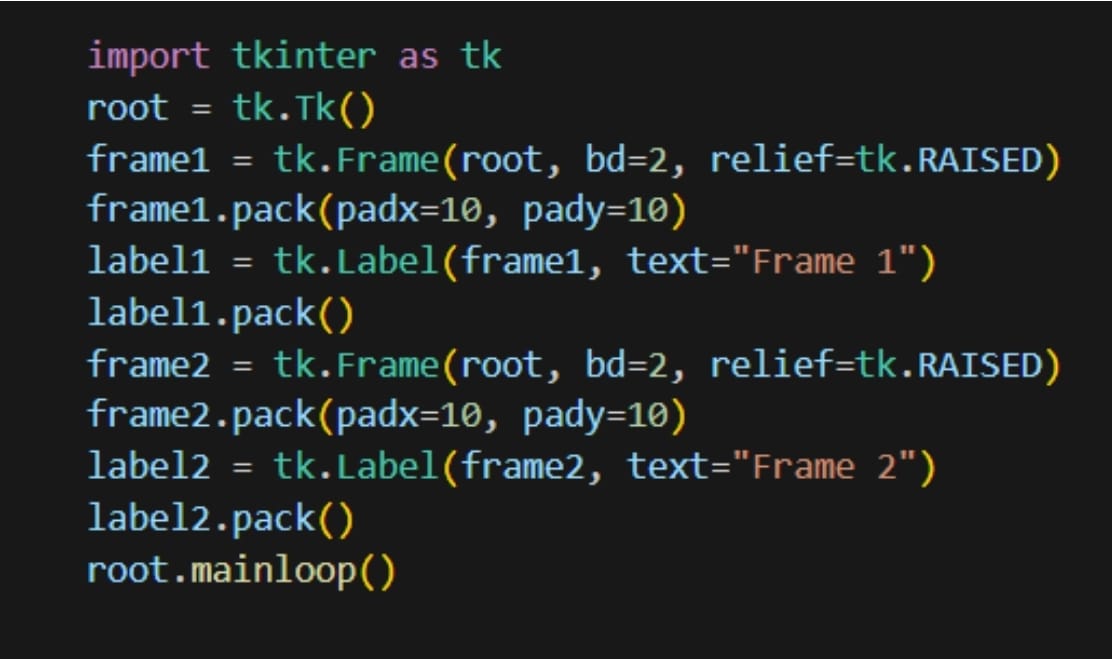
In this example, we create two frames, frame1, and frame2, using the Frame class. We specify the parent widget (root in this case) and additional properties such as bd (border-width) and relief (border style). Widgets can then be added to each frame using methods like pack(), grid(), or place().
Working with Menus:
Menus are an essential component of GUI applications that allow users to access various actions and functionalities. Tkinter provides two primary ways to implement menus in your applications:
- Menu: The main menu bar, typically placed at the top of the window, containing dropdown options.
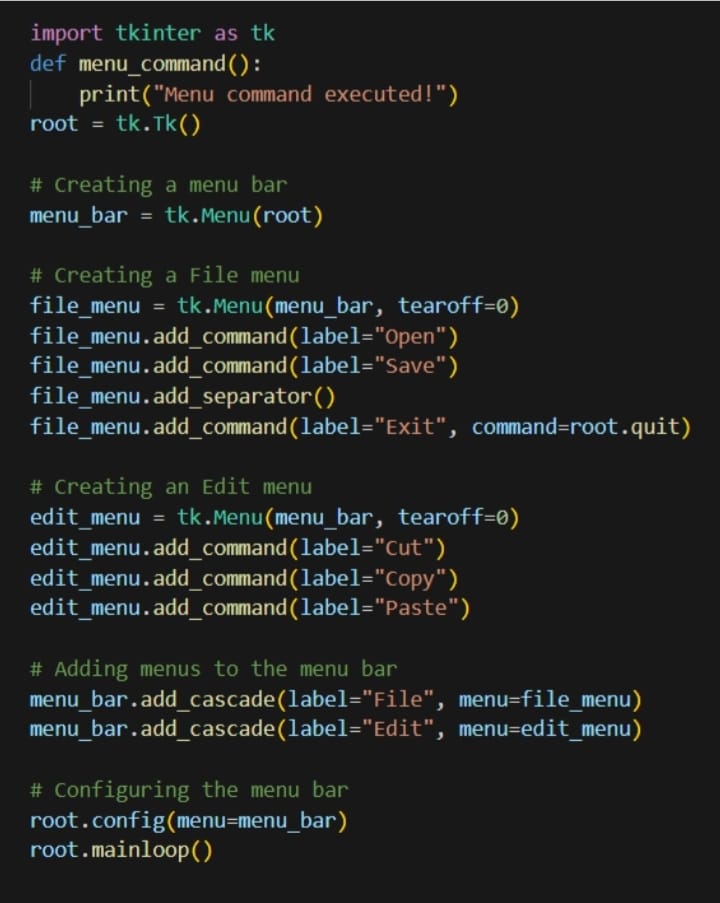
- Menu Button: A button that displays a dropdown menu when clicked, often used for context-sensitive or tool-specific actions. Example: Working with Menus in Tkinter
Conclusion
Tkinter provides a versatile and beginner-friendly framework for developing graphical user interfaces in Python. With its wide array of built-in widgets, you can design applications that are both functional and visually appealing. In this blog post, we explored the foundational building blocks of Tkinter GUI development— Buttons, Labels, and Entry Fields. These widgets form the core of most interfaces, enabling user interaction, display of static information, and input collection.
We also examined one of the most important aspects of GUI development: layout management. Tkinter offers three primary layout managers— Pack, Grid, and Place —each suited to different design needs. The Pack manager is great for stacking widgets in a straightforward manner. The Grid manager excels when you need structured, tabular layouts with precise row-column positioning. The Place manager gives you absolute control over placement, useful in specialized interfaces where manual layout is necessary.
Beyond basic widgets and layout managers, we looked at Frames and Menus, which help structure and organize your application’s interface. Frames act as containers to logically group related widgets, making your UI modular and easier to manage. Menus, on the other hand, bring professional-level navigation to your applications, offering users access to common actions through intuitive dropdowns and submenus. Mastering these elements—widgets, layouts, frames, and menus—gives you the foundation to build clean, responsive, and user-friendly GUI applications.
about the author
Sumer Pasha
Sumer Pasha is a Python Automation Engineer with Analogica India. He is a python developer and uses python to develop internal utilities for Analogica.
