Python
PyCharm
A Step-by-Step Guide to Installing PyCharm


Introduction
PyCharm is a powerful integrated development environment (IDE) specifically designed for Python programming. Its user-friendly interface, advanced features, and seamless integration with popular Python libraries make it a favorite among developers. we will walk you through the process of installing PyCharm on your system, whether you're using Windows.
Prerequisites
Before you begin, make sure you have the following prerequisites:
- A computer running Windows, macOS, or Linux.
- A stable internet connection.
- Basic knowledge of your operating system's file management.
Step 1: Downloading PyCharm
To get started, follow these steps to download PyCharm:
-
Open your web browser and navigate to the official PyCharm website: https://www.jetbrains.com/pycharm/.

-
Click on the "Download" ⮋ button to access the download page.
-
If your fresher choose Community is free and open-source
-
Choose the edition of PyCharm you want to install (Community or Professional) and click the corresponding "Download" button.
Step 2: Installing PyCharm
The installation process may vary slightly depending on your operating system.
Windows:
-
Locate the downloaded setup file (e.g., pycharm-community-2023.2.exe) and double-click on it.
Click on the Downloaded file
Getting Started:
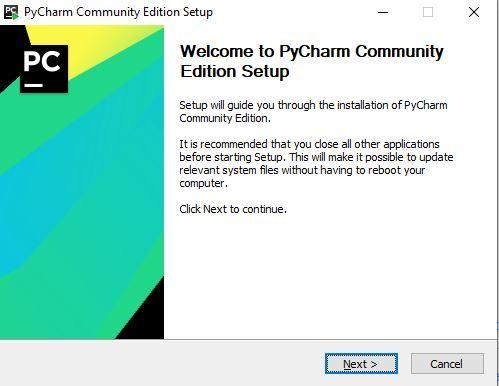
Click on Next
-
The installation wizard will appear. Follow the on-screen instructions.
-
Choose the installation location or keep the default, and then select any additional components you want to install.

Choose the Destination Folder 📁 and Next
-
Installation Option:

**Thick ✔ **all the boxes and Next
-
Selecting Start Menu Folder:

Click on Install
-
Processing Installation:
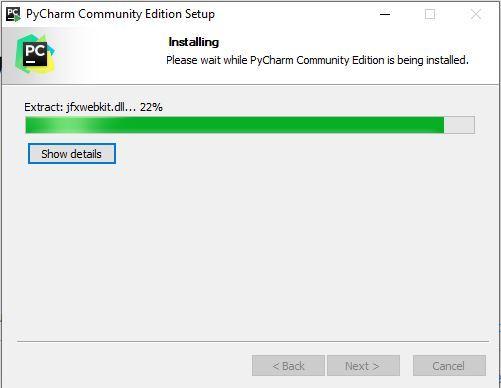
After completion Click on Next
-
Finished Installation:

It’s better to choose Reboot now otherwise Choose I want to manually reboot later Click on the Finish
-
Once installed, you can launch PyCharm from the Start menu or desktop shortcut.
-
Getting Done with License Agreement:
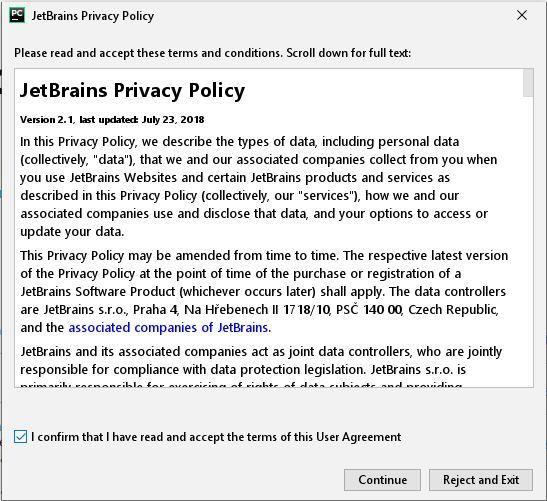
Thick ✔ and Continue
Step 3: Setting Up PyCharm
After launching PyCharm for the first time, you'll need to perform some initial setup:
- Choose the UI theme and keymap that you prefer.
- Create or log in to your JetBrains account (optional but recommended for accessing additional features).
- Configure your Python interpreter: You can either use a system interpreter or create a virtual environment.
Step 4: Exploring PyCharm
Now that PyCharm is installed and set up, take some time to explore its features:
- Project creation: Create a new Python project or open an existing one.
- Code editing: Write, edit, and format Python code with intelligent code completion and analysis.
- Version control: Integrate Git or other version control systems for collaborative development.
- Debugging: Set breakpoints, inspect variables, and debug your code with ease.
- Package management: Install, update, and manage Python packages using the built-in package manager.
References:
PyCharm: the Python IDE for Professional Developers by JetBrains : https://www.jetbrains.com/pycharm/
How to install Python Pycharm on Windows? - GeeksforGeeks : https://www.geeksforgeeks.org/how-to-install-python-pycharm-on-windows/#practice
Conclusion:
Congratulations! You've successfully installed PyCharm, a versatile IDE that empowers you to write, debug, and manage Python code efficiently. With its powerful features and user-friendly interface, PyCharm is an essential tool for both beginners and experienced developers. Start exploring its capabilities and watch your Python development workflow become smoother and more productive. Happy coding!
about the author
Sumer Pasha
Sumer Pasha is a Python Automation Engineer with Analogica India. He is a python developer and uses python to develop internal utilities for Analogica.
